How to Install a Leveling Kit
In comparison to their suspension lift kit counterparts, leveling kits are much more cost effective and easier to install. Depending on what kind of kit you buy, you will have to replace very few parts and you won’t affect the factory payload capacity of your vehicle. While it’s relatively simple, it’s still a highly mechanical process, so we suggest reading through all your instructions before you get started and checking to make sure you have all the tools necessary.
The great thing about leveling kits is that you typically don’t have to replace numerous parts to install them. However, you will need to disassemble some of the components of your current or factory suspension in order to install the leveling kit. Some helpful tools you want to keep handy are:
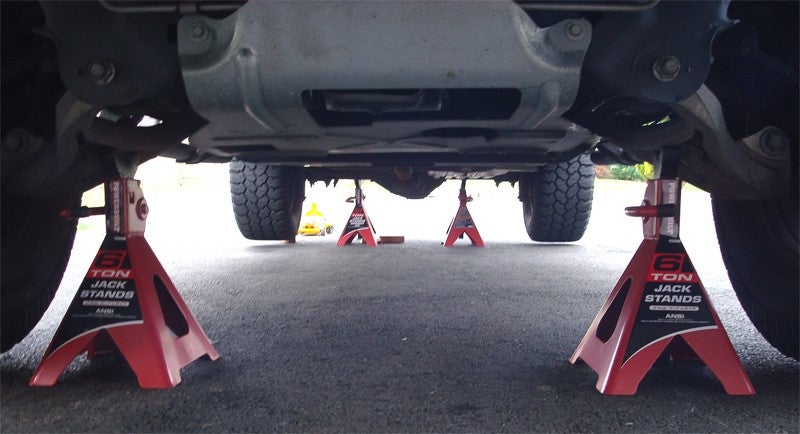
- Floor jack and jack stands rated for the correct weight to support your make and model
- Torque Wrench
- Wrenches (various sizes)
- Screw driver
- Pliers
- Hammer
- Extra nuts, bolts and screws in case you misplace yours
- Ratchet
- PB Blaster

While most leveling kits are similar, our instructions are merely a guide – always consult a trained and licensed suspension expert if you have any questions, and don’t deviate from the guide included in your kit. In general, we suggest that for all installations you:
- Open your kit and make sure all necessary parts are included.
- Read over your instructions before you begin.
- Always block off your tires and make sure your vehicle is in park with your emergency brake on.
- Gather torque specifications from the installation instructions or from shop manuals for your vehicle.
- Safety first – if you don’t feel safe doing something, it’s probably not.
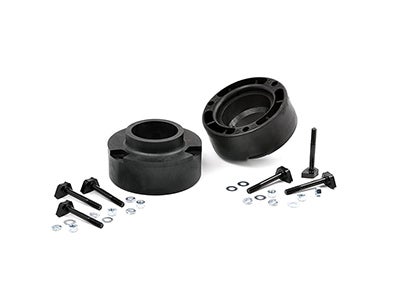
Installing Coil Spring Spacers
Kit specific tools suggested: Spring compressors
- Block off your rear tires and make sure your vehicle is parked with the emergency brake on. Use a hydraulic jack (jacks from spare tire kits won’t be sufficient) and jack stands to lift your front two wheels off the ground. Refer to your owner’s manual for the correct jacking points to safely lift the vehicle. Support with jack stands on the frame of the vehicle – do not rely on the jack to hold the weight of the vehicle while you work.
- Remove your tires.
- Once your tires are removed, raise your suspension with a floor jack on the axle so that the spring is compressed slightly. This will make it easy to remove.
- Install your spring compressor onto the spring, making sure it’s secure.
- Remove the spring retaining clip.
- Remove the shocks.
- Remove your sway bar link.
- If the bump stop is located inside the coil spring, remove it. It should come out easily, and we suggest using pliers or a pry bar, but if not, feel free to add PB Blaster.
- Lower the axle housing on the jack. Your coil should easily come out, held together by the spring compressor.
- OPTIONAL: While your coil and other components are out, you may want to take this time to grease the places where all the removed parts were attached in order to ease them back in. You may also want to clean the wheel.
- Ensure all fasteners are tightened to OEM spec or the specs provided in the installation instructions for your kit.
- Place the coil spring spacer in the spring seat over the bump stop.
- Keeping the spring compressor on your spring, replace the spring in its original place, attaching the spring retaining clip.
- Jack your wheel back up to the height it was when you first compressed the spring. Once secure, remove the spring compressors.
- Put the bump stop back in place, install sway bar link, and put shocks back on.
- Make sure everything is securely attached to your vehicle’s specifications.
- Repeat on the other side.
- Once your spring spacers are fully installed, replace the tires and lower your vehicle back down. Remove all blocks.
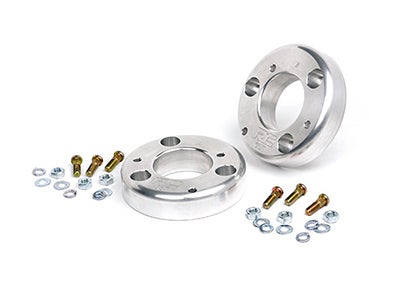
Installing Strut Extensions
- Block off your rear tires and make sure your vehicle is parked with the emergency brake on. Use a hydraulic jack (jacks from spare tire kits won’t be sufficient) and jack stands to lift your front two wheels off the ground. Refer to your owner’s manual for the correct jacking points to safely lift the vehicle. Support with jack stands on the frame of the vehicle – do not rely on the jack to hold the weight of the vehicle while you work.
- Remove your tires.
- Depending on your kit’s instructions, your first step towards assembly will be to put the six studs that came in your kit into the strut extenders, preparing it for placement on top of your factory strut.
- Disassemble the sway bar link.
- Remove the tie rod end fastener.
- Loosen the ball joint. The knuckle may need to be separated from the upper ball joint. Keeping the ball joint loose, knock the tie rod end out of place. You may want to use a mallet to get it out of the knuckle. Strike the knuckle where the tie rod end and ball joints pass through. Be careful not to strike the stud of the tie rods or ball joints. The threads may be damaged and prevent re-installing later.
- Remove the lower strut bolt. Some struts are slotted for alignment purposes. When removing the lower nut, mark both surfaces with a paint marker or a scribe for re-alignment later.
- Support the lower control arm with a jack and use a pry bar on the upper control arm to remove the ball joint fully, pushing the knuckle out of the way to get to the strut.
- Unfasten the top three fasteners on the strut. Carefully lower the jack that is supporting the lower control arm. This should give you enough room to remove the full strut assembly.
- Ensure all fasteners are tightened to OEM spec or the specs provided in the installation instructions for your kit.
- Attach your new strut extension on top of your factory strut.
- Replace the strut. You may want a crow bar to help ease it back onto the arm. Make sure the bolts are lined up properly. Don’t fasten just yet.
- Reinstall the lower strut bolt back into the strut on the arm. Align marks from step 7. Reinstall the upper ball joint.
- Push the tie rod end back into the taper and then fasten it.
- Tighten ball joint down, the tie rod end and the strut bolt.
- Tighten the top three fasteners to secure the strut in place.
- Replace the sway bar link.
- Replace your tires, making sure to tighten to correct specifications. Lower your vehicle back down and remove all blocks.
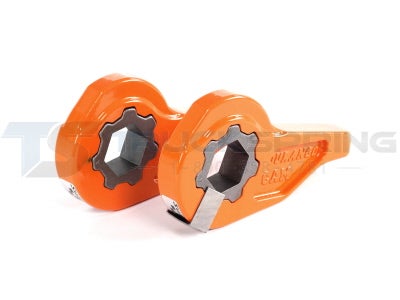
Installing Torsion Bar Keys
- Block off your rear tires and make sure your vehicle is parked with the emergency brake on. Use a hydraulic jack (jacks from spare tire kits won’t be sufficient) and jack stands to lift your front two wheels off the ground. Refer to your owner’s manual for the correct jacking points to safely lift the vehicle. Support with jack stands on the frame of the vehicle – do not rely on the jack to hold the weight of the vehicle while you work.
- You’re going to want to take the pressure off the suspension and torsion bars. You can use either a sturdy G clamp, like this one from X, or one of these torsion bar removal tools. Attach it to the cross member and tighten so that it presses on your torsion bar keys.
- Remove the retaining plates by removing the adjusting bolts.
- Remove your clamp or torsion bar removal tool.
- Your torsion bar key may fall out easily at this point. Many times the keys can be stuck and will present a challenge to remove. At that point, a sledge hammer and PB Blaster will be your friend as it may take a bit of persuasion to remove the keys. In some extreme cases the keys may need to be cut free from the torsion bars with a torch. This should be left to professionals.
- You may want to mark on the cross member the exact position to help put in the new key.
- Once the old keys are out, you’ll be able to see that there’s a difference in angle between the old and new keys, which is how you’ll get the lift. Insert the new torsion bar key.
- You’re basically going to work backwards now. Re-clamp the key and the cross member. Replace the retaining plates and secure with adjusting bolts.
- Repeat steps 2-7 on the other side.
- Make sure that all parts are securely tightened. Ensure all fasteners are tightened to OEM spec or the specs provided in the installation instructions for your kit.
- Lower your vehicle back down to the ground.
Additional Tips
- We can’t stress the importance of giving your instructions at least one read through before you begin. Doing so will give you a better idea of time and the tools you need.
- Any change to the suspension changes your vehicle’s alignment, even if you’re just adding a leveling kit. We suggest taking your vehicle into your local garage to get it aligned, or to at least get your work checked out.
- When in doubt, consult a professional. We have trained and licensed suspension experts who will be happy to help you at 800-358-4751.
Find a Leveling Kit to Fit Your Vehicle
We have some of the best leveling kits from our most trusted manufacturers. To get started shopping online, select the make of your vehicle below.
Step 1: Choose Your Vehicle Make
Select your vehicle make, Year, and model, to see a list of products that fit your specific vehicle. Begin by choosing the make of your vehicle below.
Ask an Expert

Our Michigan based experts can help.
1.800.358.4751
EmailHours
M-F 7:00AM - 11:00PM EST
Sat 8:00AM - 1:00PM EST
